There’s a certain satisfaction in getting a fresh set of acrylic nails, but removing them the wrong way can leave your natural nails thin, weak, and damaged.
If you’re saving money between salon visits, dealing with a broken nail, or simply prefer doing your nail care at home, learning how to soak off acrylic nails at home safely is a skill worth having.
The good news is that removing acrylic nails at home isn’t difficult. It simply requires the right materials and, most importantly, patience. Rushing the process or trying to pry acrylics off is where most at-home nail damage happens.
In this guide, we’ll walk through exactly how to soak off acrylic nails safely, step by step, using the acetone-and-foil method commonly used for acrylic removal.
We’ll also cover safety precautions, common mistakes, aftercare tips, and ways to keep your natural nails healthy once the acrylics are gone.
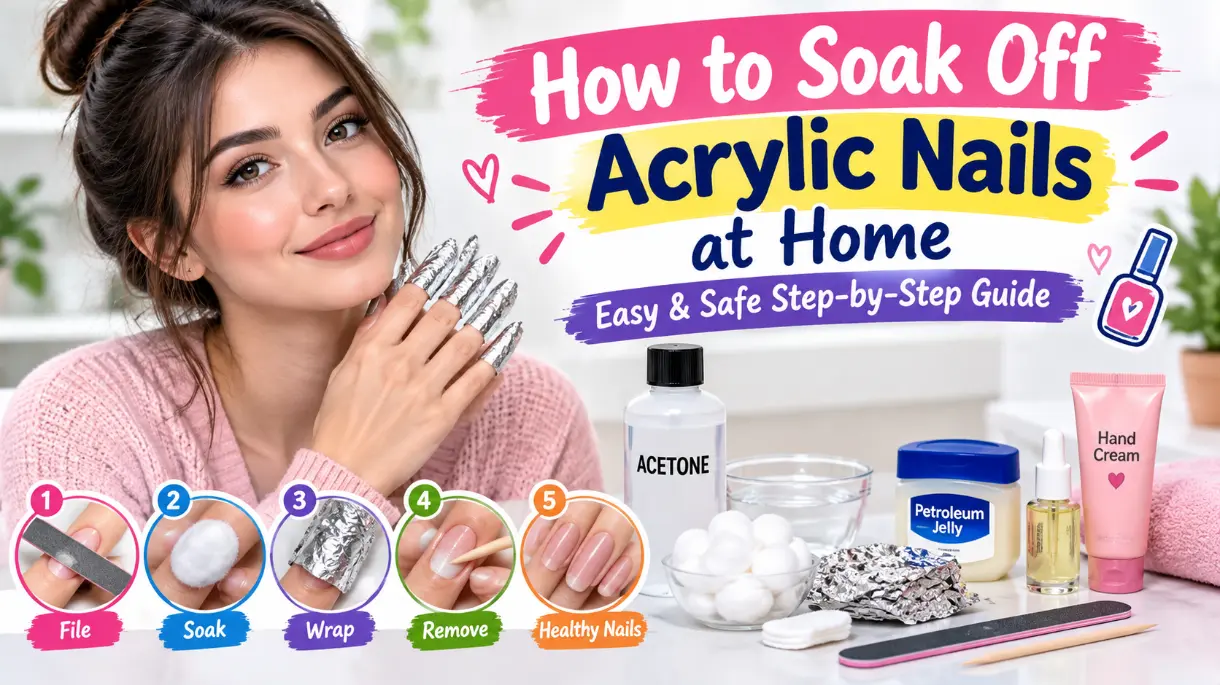
What You’ll Need to Soak Off Acrylic Nails at Home 🧰
Before you begin, gather everything you need so you don’t have to interrupt the process.
- Pure acetone
- Nail clippers
- A coarse nail file
- Cotton balls or cotton pads
- Small pieces of aluminum foil
- Nail buffer
- Petroleum jelly or cuticle oil
- Cuticle oil
- Hand cream
- A small bowl or tray for supplies
Tip: Having everything ready beforehand makes the removal process easier and reduces the temptation to rush.
How to Soak Off Acrylic Nails at Home: Step-by-Step 💅
1. Trim the Acrylic Nails
Start by trimming the acrylic nails as short as you can comfortably make them using nail clippers.
Removing the extra length first means there is less acrylic for the acetone to break down, which can make the soaking process easier.
Be careful not to clip into your natural nail.
2. File Away the Top Layer
Use a coarse nail file to gently remove the shiny top layer of the acrylic.
You don’t need to file the acrylic completely off. The goal is simply to break through the surface so the acetone can penetrate more effectively.
Take your time and avoid aggressive filing, especially as you get closer to your natural nail.
3. Protect the Skin Around Your Nails
Apply a thin but generous layer of petroleum jelly or cuticle oil around the skin surrounding each nail.
Acetone can be very drying and may irritate the skin with prolonged contact. Protecting the surrounding skin helps reduce unnecessary dryness and irritation.
Important: Try to keep the acetone concentrated on the acrylic and nail rather than soaking the surrounding skin unnecessarily.
4. Soak Cotton With Acetone
Saturate a cotton ball or cotton pad with pure acetone.
Place the acetone-soaked cotton directly over the acrylic nail, making sure the acrylic is well covered.
5. Wrap Each Nail With Foil
Cut aluminum foil into small squares and wrap each fingertip securely around the acetone-soaked cotton.
The foil helps hold the cotton in place and keeps it in close contact with the acrylic.
Repeat the process for each nail.
6. Wait Patiently for the Acrylic to Soften
This is the part where patience matters most.
Allow the acrylic to soak and soften rather than trying to remove it by force. Depending on the thickness and type of acrylic, the process can take some time.
After the initial soaking period, gently check one nail.
If the acrylic is still hard and firmly attached, re-soak it rather than prying or peeling it off.
7. Gently Remove the Softened Acrylic
Once the acrylic has softened, gently push or wipe away the loosened product using an appropriate manicure tool or a wooden cuticle stick.
Never force acrylic that remains firmly attached.
If you encounter resistance, apply more acetone and allow additional soaking time.
Key Takeaway: The acetone should do most of the work. If you have to force the acrylic off, it probably needs more soaking.
8. Buff and Smooth the Natural Nails
After the acrylic has been removed, gently buff away any small remaining traces of product.
Avoid excessive buffing because your natural nails may already feel thinner or more flexible after acrylic removal.
The goal is to smooth the surface, not aggressively thin the nail.
9. Wash and Moisturize Your Hands
Once you’re finished, wash your hands thoroughly and apply cuticle oil and a rich hand cream.
Acetone can leave both your skin and nails feeling extremely dry, so moisturizing immediately after removal is an important part of the process.
Safety Precautions When Using Acetone ⚠️
Acetone is an effective and widely used solvent for acrylic removal, but it is still a strong chemical that deserves care and respect while you work.
Work in a Well-Ventilated Area
Acetone vapors can be unpleasant and may cause irritation or discomfort, particularly in an enclosed space.
Open a window or use appropriate ventilation while you work.
Keep Acetone Away From Open Flames
Acetone is highly flammable.
Avoid working near lit candles, gas stoves, cigarettes, or other sources of ignition.
Protect the Skin Around Your Nails
Prolonged acetone contact can dry out and irritate the skin, sometimes causing redness or cracking.
Applying petroleum jelly or cuticle oil around the nail and cuticle area can help protect the surrounding skin.
Don’t Leave Acetone-Soaked Cotton on Your Skin Unnecessarily
Make sure the cotton is positioned over the nail rather than resting extensively on the surrounding skin.
If the cotton shifts, reposition it to minimize unnecessary acetone exposure.
Keep Acetone Away From Children and Pets
Store acetone securely and never leave an open bottle or acetone-soaked cotton unattended where children or pets can reach it.
Avoid the Method on Irritated or Broken Skin
If you have cuts, cracked skin, significant irritation, or signs of infection around the nail, consider postponing removal and seeking advice from a qualified professional.
Stop if You Experience Significant Irritation
If you develop severe burning, swelling, or a concerning reaction, stop the process and remove the product from your skin.
Important: Never force acrylic off a painful, damaged, or irritated natural nail.
Common Mistakes to Avoid When Removing Acrylic Nails 🚫
Removing acrylic nails at home becomes much safer when you avoid the mistakes that can damage the natural nail underneath.
❌ Peeling or Prying Off Acrylic
This is one of the biggest mistakes people make.
Trying to peel or pry off firmly attached acrylic can take layers of the natural nail with it.
❌ Skipping the Filing Step
Leaving the thick, shiny surface completely intact can make it harder for acetone to penetrate the acrylic.
❌ Rushing the Soaking Process
If the acrylic hasn’t softened enough, give it more time.
Tip: Re-soaking is safer than forcing stubborn acrylic off.
❌ Over-Buffing the Natural Nail
Once the acrylic is gone, avoid repeatedly filing or buffing the natural nail in an attempt to make it perfectly smooth.
❌ Ignoring Aftercare
Acetone and acrylic removal can leave your nails and surrounding skin dry. Moisturizing and using cuticle oil can help improve their appearance and comfort.
Aftercare for Natural Nails After Acrylic Removal 🌿
Removing the acrylic is only half the process. How you care for your natural nails in the days and weeks afterward can make a big difference.
Moisturize Consistently
Acetone is drying by nature, even when you protect your skin during removal.
Apply cuticle oil regularly and follow up with a rich hand cream to help restore moisture to your nails and surrounding skin.
Give Your Nails a Break
It can be tempting to immediately apply fresh polish or another acrylic set.
Consider giving your natural nails some time without enhancements if they feel weak, thin, or irritated.
Watch for Signs of Nail Damage
Keep an eye out for:
- Peeling or splitting
- Unusual thinness
- Increased sensitivity
- Persistent discoloration
- Changes in nail texture
- Pain or swelling
Mild dryness or temporary flexibility can occur after removal, but persistent or worsening problems should be evaluated by a healthcare professional or qualified nail professional.
Consider Gentle Nail Care
Nourishing cuticle oils, moisturizing creams, and gentle nail-care products can help keep your nails and surrounding skin comfortable while they grow out.
Build Healthy Nail Habits
Wearing gloves while cleaning, avoiding unnecessary exposure to harsh chemicals, and allowing adequate time between artificial nail applications can help reduce stress on your natural nails.
Key Takeaway: Healthy-looking nails benefit from gentle care, moisture, and avoiding unnecessary picking, peeling, or aggressive filing.
How Long Does It Take to Soak Off Acrylic Nails?
The exact removal time varies depending on the thickness of the acrylic, the products used, and how well the surface was filed before soaking.
The important thing is not to focus on a specific number of minutes. Instead, check whether the acrylic has become soft enough to remove gently.
If it remains hard or firmly attached, continue soaking rather than forcing it.
Can You Remove Acrylic Nails Without Acetone?
Acetone is generally one of the most effective ways to break down traditional acrylic nail products at home.
Some people look for acetone-free removal methods, but attempting to peel, pry, or force acrylic away from the natural nail can cause damage.
If acetone is unsuitable for you or you are concerned about the condition of your nails, having the acrylics removed professionally can be a safer option.
Frequently Asked Questions
Is it safe to soak off acrylic nails at home?
Acrylic nails can generally be removed at home with careful preparation, acetone, and patience. The biggest risk comes from forcing, peeling, or aggressively filing the acrylic instead of allowing it to soften.
How do you remove acrylic nails without damaging natural nails?
Trim the acrylic, file down the surface, soak it with acetone, and gently remove the softened product. Avoid pulling, peeling, or prying at acrylic that remains firmly attached.
Why won’t my acrylic nails come off with acetone?
Thick acrylic, insufficient filing, or inadequate soaking can make removal take longer. Instead of forcing the product off, file the surface a little more and continue soaking.
Should I buff my nails after removing acrylics?
You can gently smooth small traces of leftover product, but avoid aggressive or repeated buffing. Natural nails can be more fragile after acrylic removal.
What should I put on my nails after removing acrylics?
Cuticle oil and a moisturizing hand cream are good options for restoring moisture to dry nails and surrounding skin after acetone exposure.
Conclusion
Soaking off acrylic nails at home doesn’t have to be intimidating.
With the right materials, a bit of patience, and a willingness to let acetone do the work instead of forcing anything off, it can be a manageable part of your at-home nail-care routine.
The key takeaway is simple: speed is never worth sacrificing the health of your natural nails. Filing properly, protecting your skin, and re-soaking stubborn spots instead of prying will always be preferable to rushing the removal process.
Once your acrylics are off, consistent aftercare can help keep your natural nails and surrounding skin moisturized and comfortable.
And if anything feels uncertain, painful, or unusually difficult, having a professional remove the acrylics is a safe alternative.

I’m Lydia Laughlin, founder of Punvio, where I craft clever puns, witty wordplay, and humor-filled content to make your day brighter—one laugh at a time.